Switching ideas
- Freddie Masterson

- Mar 19, 2020
- 3 min read
Updated: May 7, 2020
Due to not having the VR available for use I decided to make some sort of pixel art game. This was mainly due to the fact that creating pixel art textures are much faster and easier than 3D models and sprites. I came up with a quick idea of having the game as a top-down, pixel art dungeon crawler.
I started by creating a new Unity Project which I selected to be a 2D project. I created some basic textures that I could place around the scene so that I could tell that the player was actually moving and whether their movement speed was realistic. Whenever importing pixel art textures you have to set the filter mode to be 'Point' so that the textures are not stretched to become blurry as well as turn the compression to be none so that quality is not lost.

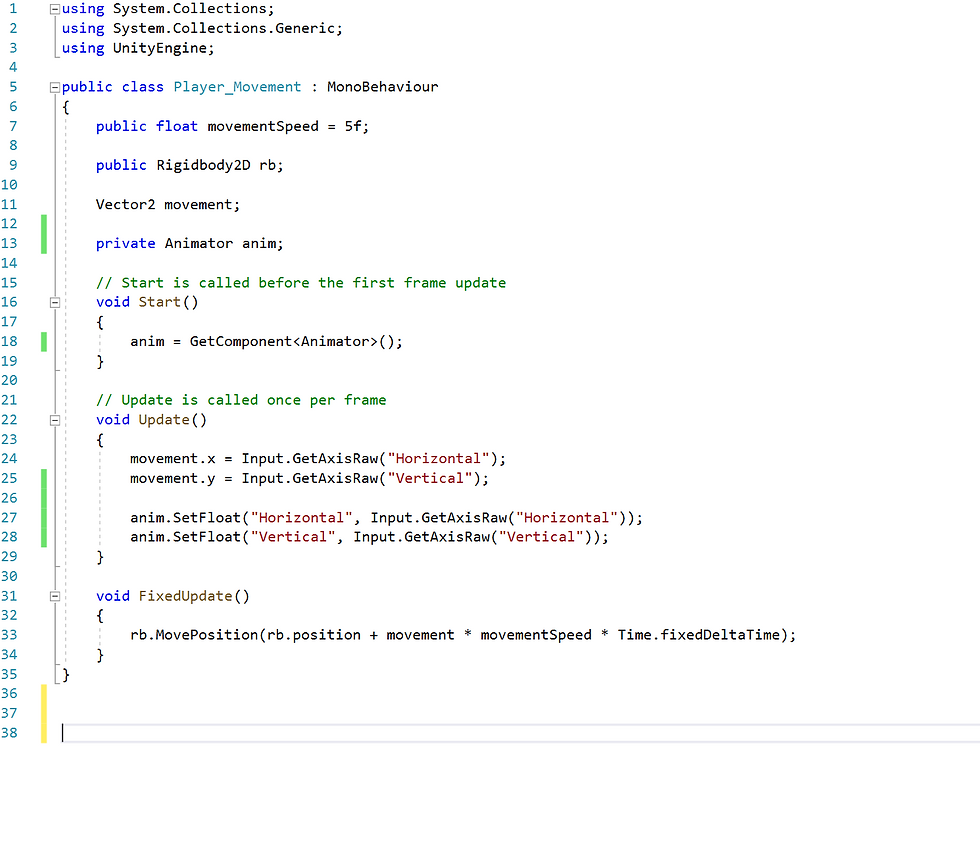
I set the camera to be a child of the player - meaning that the camera will follow the player as they move around the scene. Below is a simple movement script I used to control the player.
Line 7: I created a float variable called "movementSpeed" which I set to public so I could adjust its value outside of the script and within the editor. By default I set the value to be 5.
Line 9: I created a public reference to the RigidBody2D component that controls the physics and forces to do with the player. I called this reference "rb" as it would make programming more efficient.
Line 11: I created a Vector2 called movement, a Vector2 is a mathematical model that represents direction and magnitude. It is a Vector2 as I am only working on two axis - the X and Y axis. I labelled this Vector2 movement so that I could reference it within the program.
Line 23 and 24: The update function runs once every frame, so any code within this update function will run every frame. Every frame the "movement" - the reference name for the Vector2, will update its values to be equal to "Input.GetAxisRaw" for the "Horizontal" and "Vertical" axis. This is a built in input field by Unity which is the same as holding down the left or right arrow keys, or even the A and D keys. The update functions is updating the Vector2 coordinates based off what inputs it receives.
Line 29: This line is updating the position of the rb (The RigidBody2D component) by getting its postion, adding the "movement" values from the Vector2, multiplied by the float called "movementSpeed". This calculates the direction and force that the player should be moving. This is then multiplied by "Time.fixedDeltaTime" so that it can move this unit of distance per second.

I created several basic animations for the player, these included:
-IdleSouthFacing
-WalkingSouth
-WalkingEast
-WalkingWest
-IdleNorthFacing
-WalkingNorth
I created these animations by exporting PNG images, each of these images were different frames for the animations. I imported each image and created 6 animations by dragging each frame of the animation into the timeline as shown below.

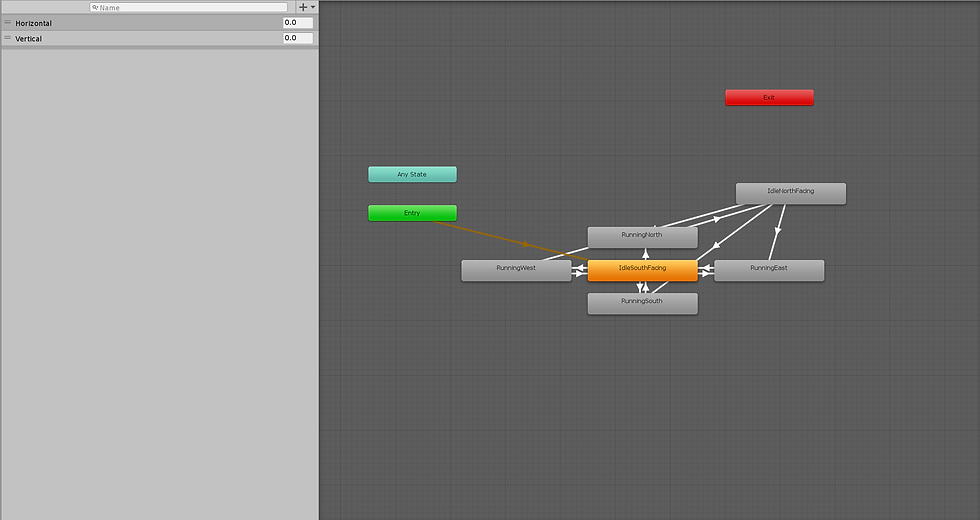
Once all of the animations had been created I had to create an animation chart which controlled what animations can transition into each other. On the left you can see two float variables called "Horizontal" and "Vertical", the values of these variables control what animation the player will transition into as certain values are required to transition certain animations.

I updated the script that controls the movement of the player. I added a private reference to the 'Animator' - which controls the animation state of an object, in this case it was controlling the players animations.
In the start function I wrote a simple line of code that defines what "anim" is referencing. GetComponent<Animator>(); gets a reference to the "Animator" component on the player object.
Line 27 and 28: set the "Horizontal" and "Vertical" variables from the Animator to be equal to input values that Unity collects through input. These lines of code change the variables in the Animator allowing the transitions to take place.

The animations were working perfectly however there was a slight problem with the movement. Whenever the player (with a BoxCollider2D) would collide with any object that also had a BoxCollider2D the player would start spinning continuously. This had a simple fix and all I had to do was freeze the rotation on the Z axis under the 'Constraints' tab.

Here is a video displaying the complete movement and animation system for this test design character. The scene looks very dark, this is due to me testing out a shader I had created allowing the textures to be affected by lighting.
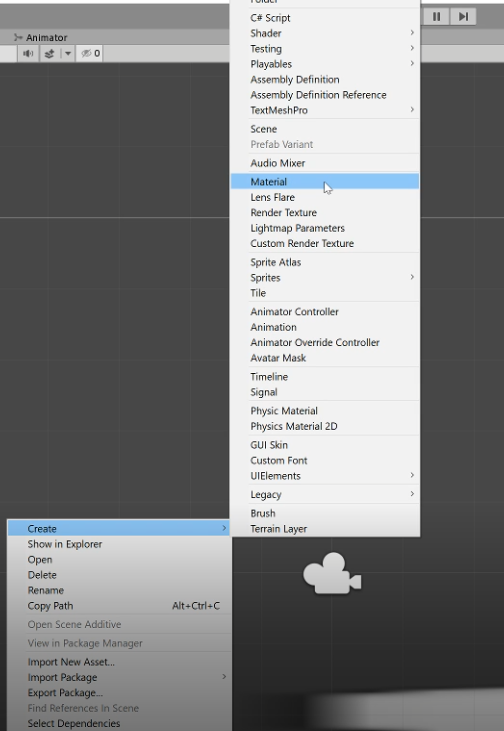
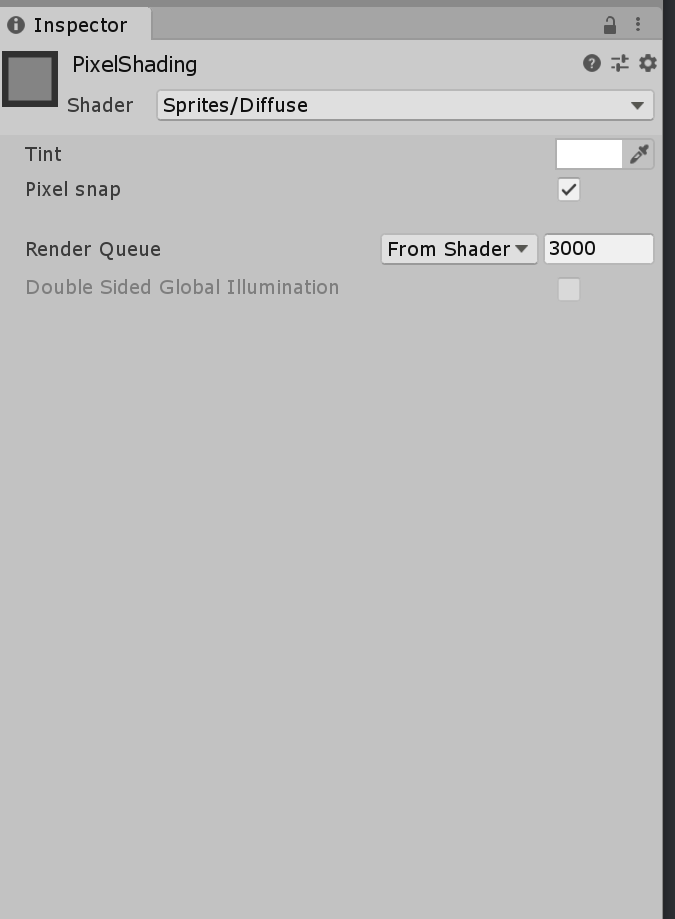
This shader was easy to make, all I had to do was make a material. Set its shading type to be 'Sprites/Diffuse'. From there I activated 'Pixel snap' and added this shader component to every object in the scene so they could be affected by lighting.


Comments